(Turn phone sideways for widescreen view)
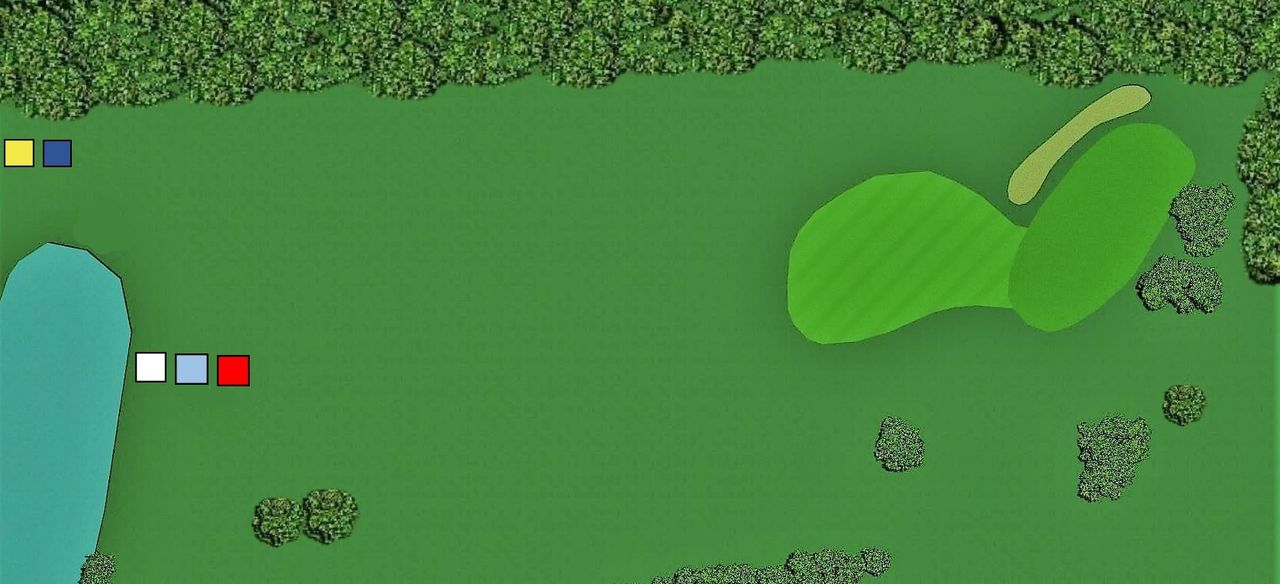
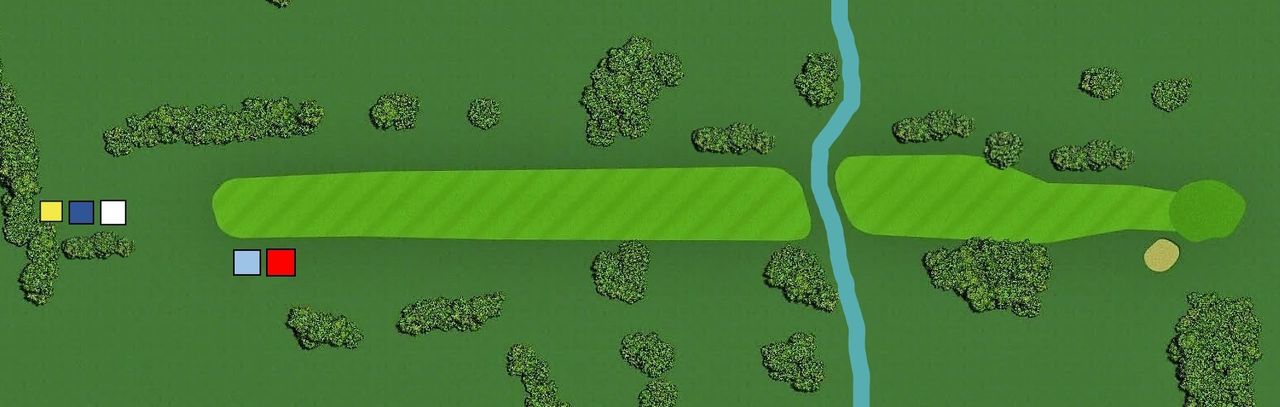
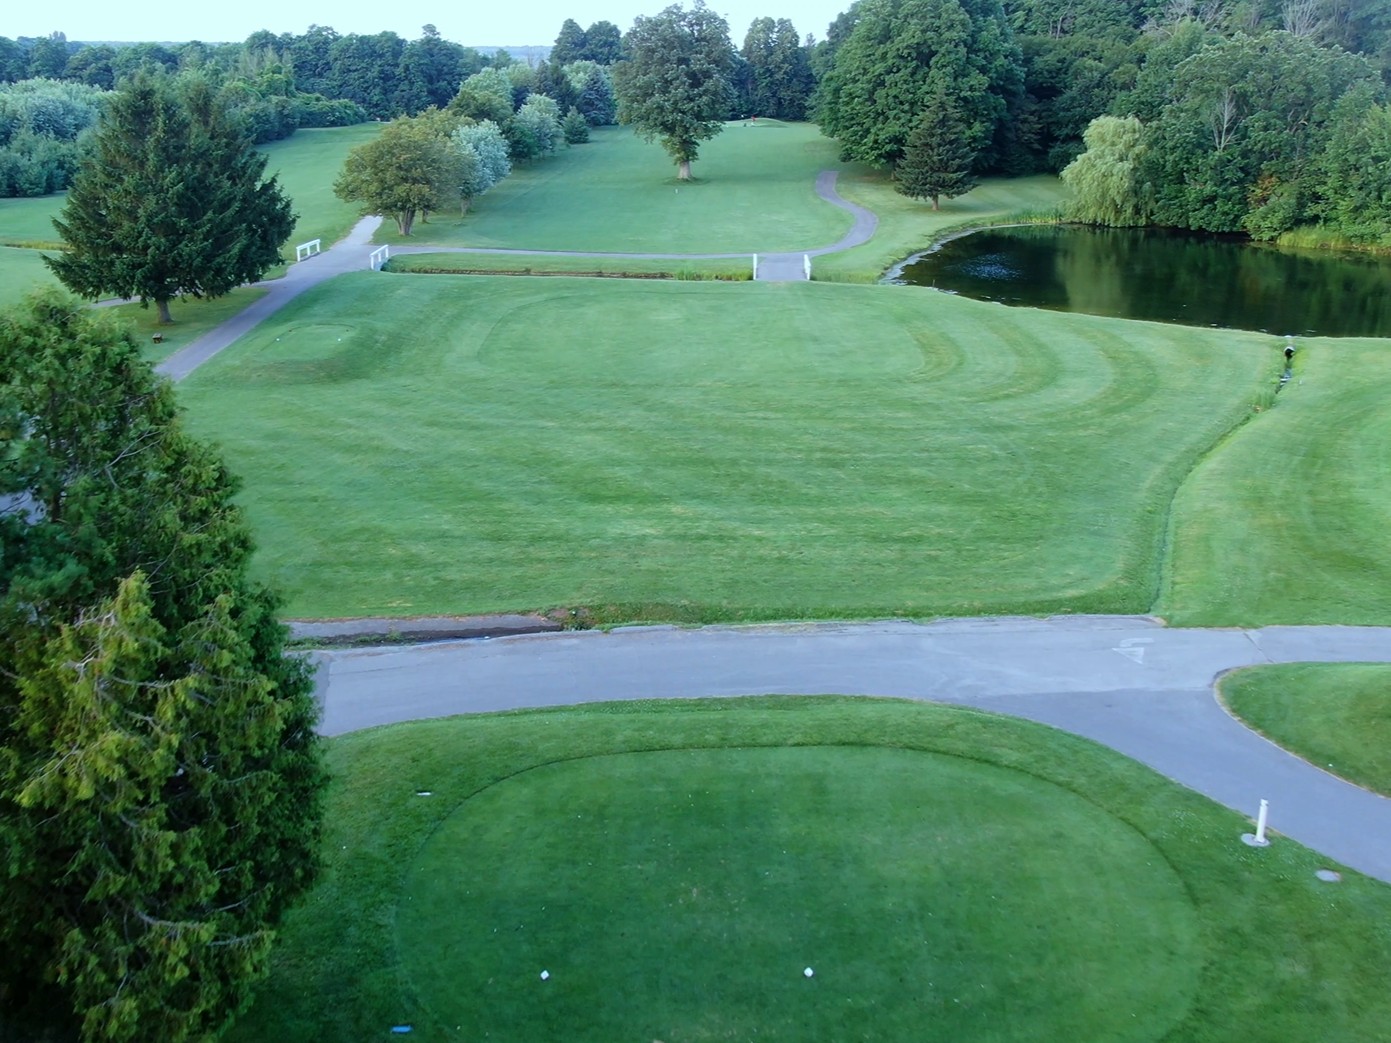
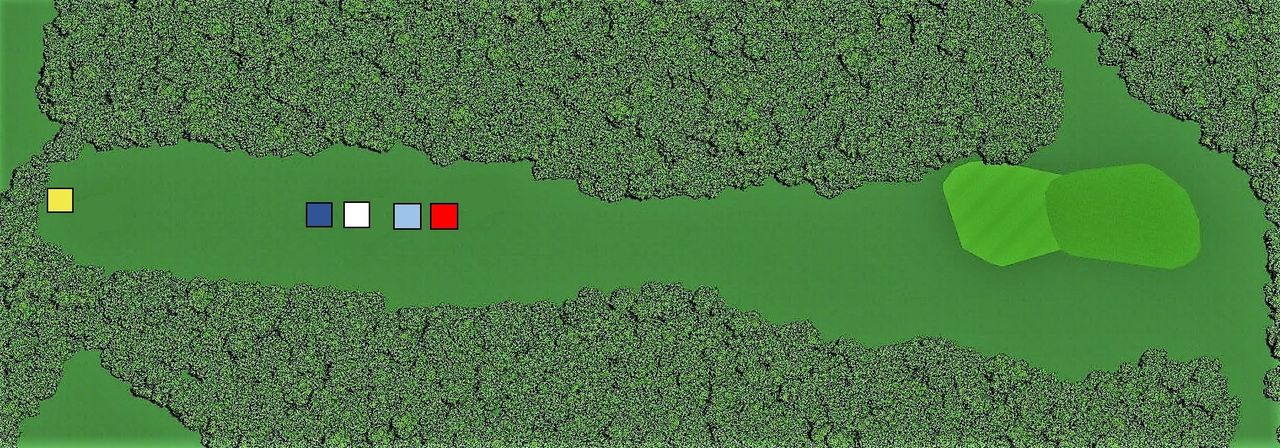
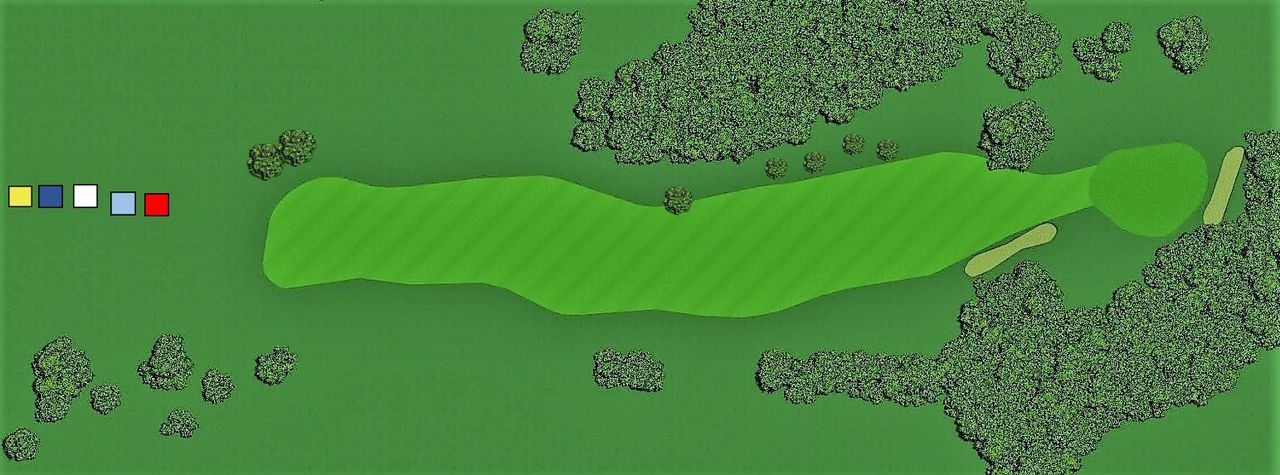
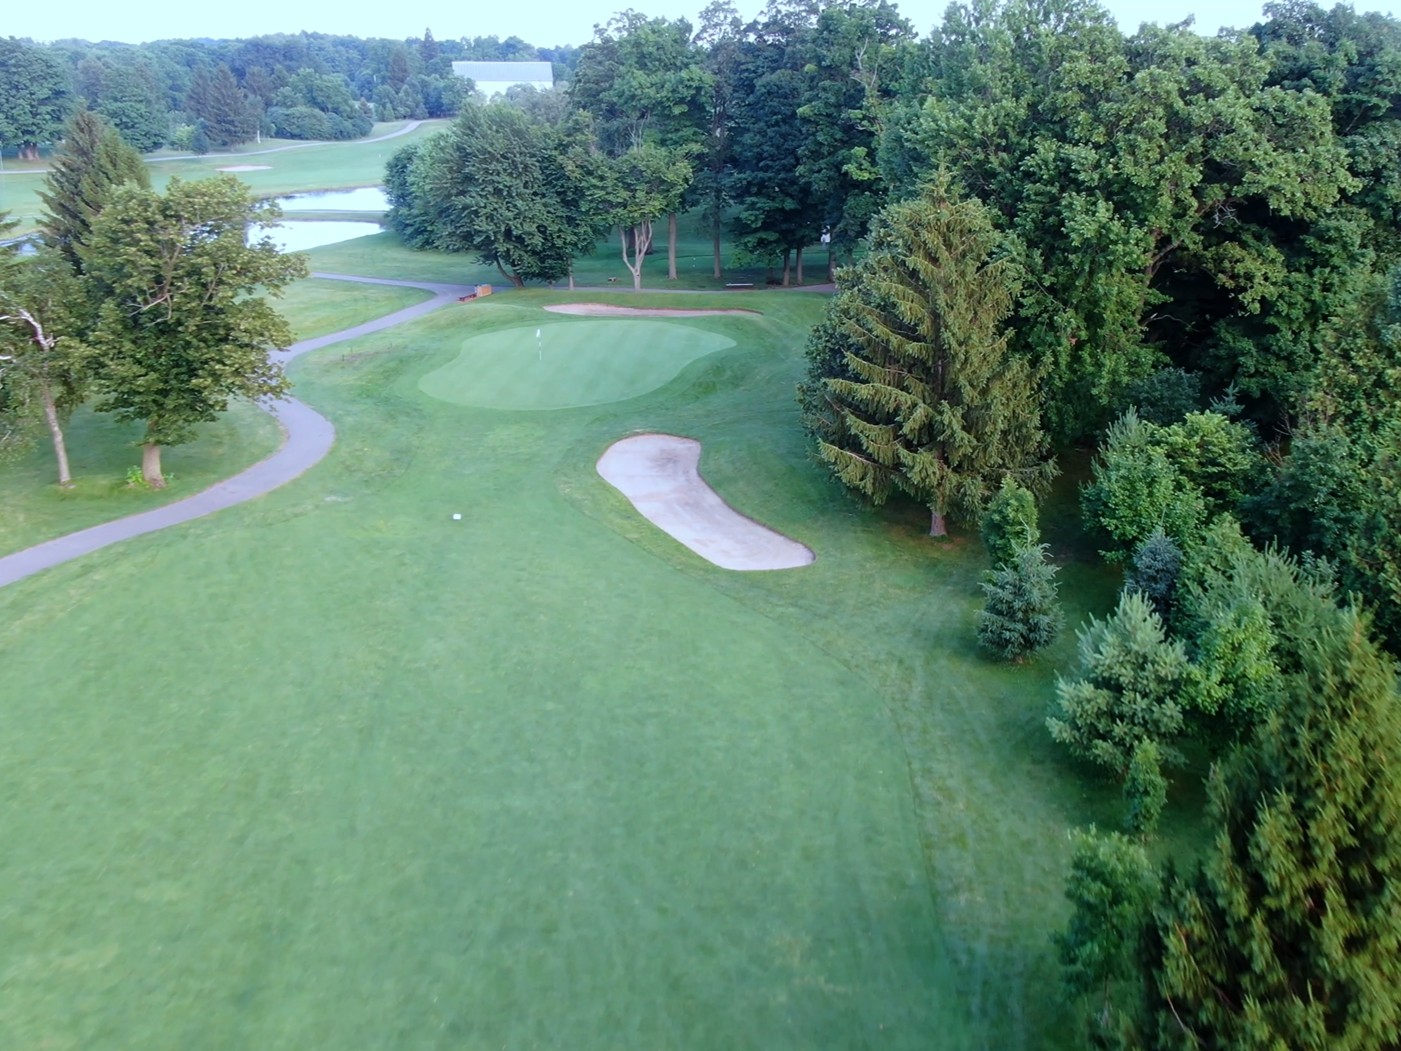
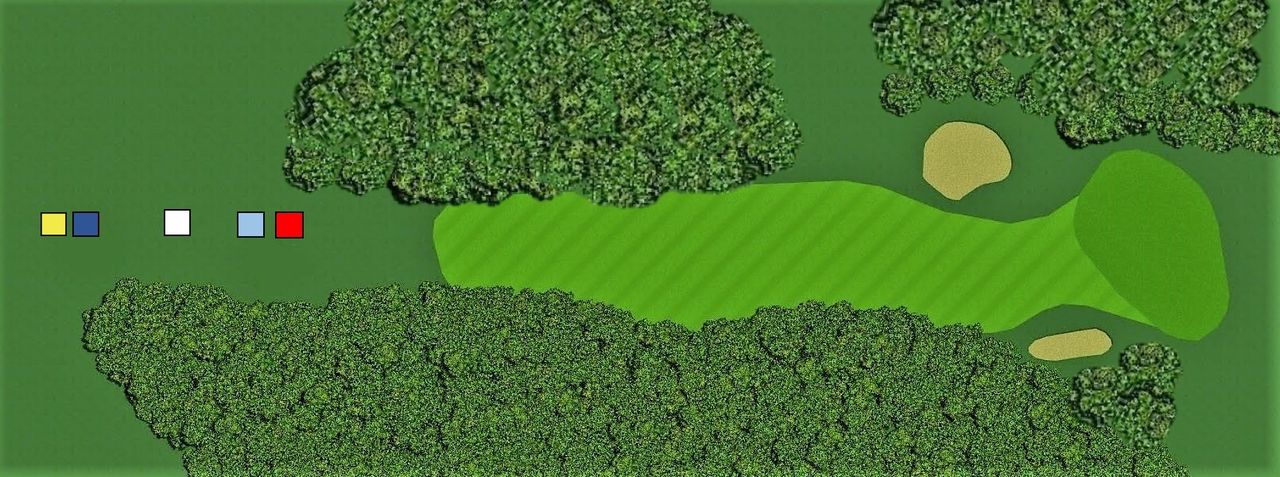
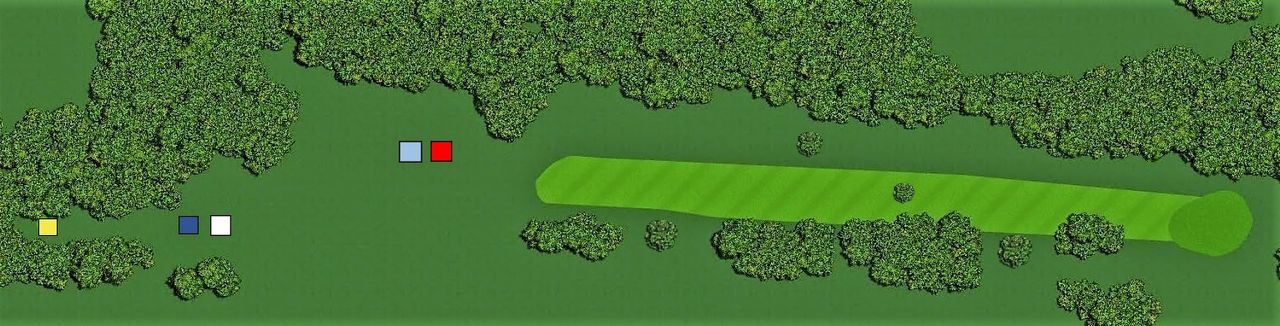
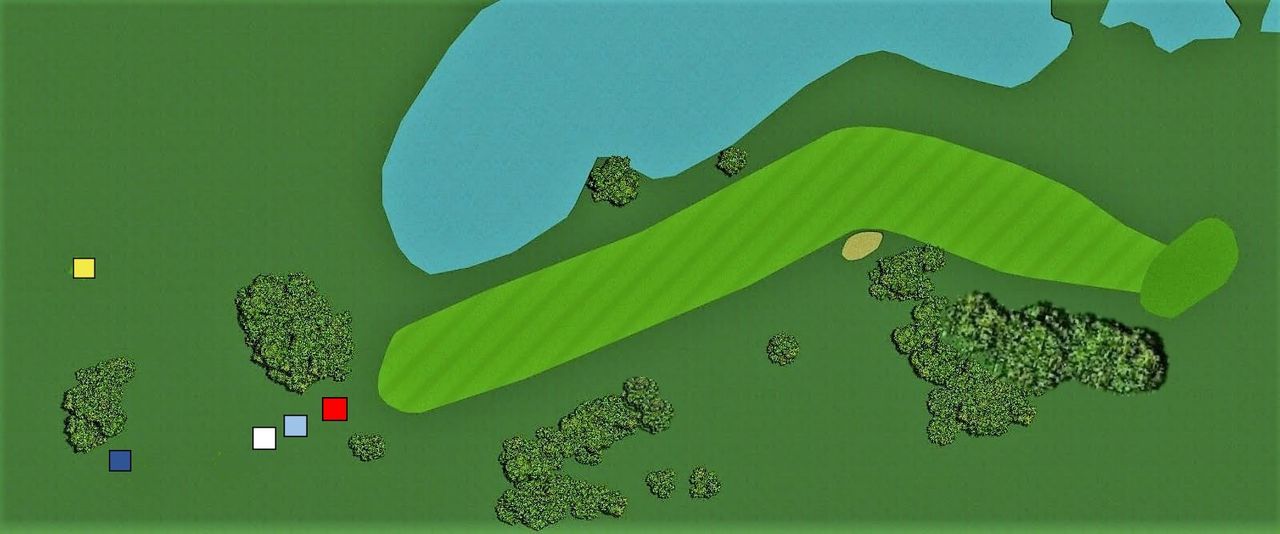
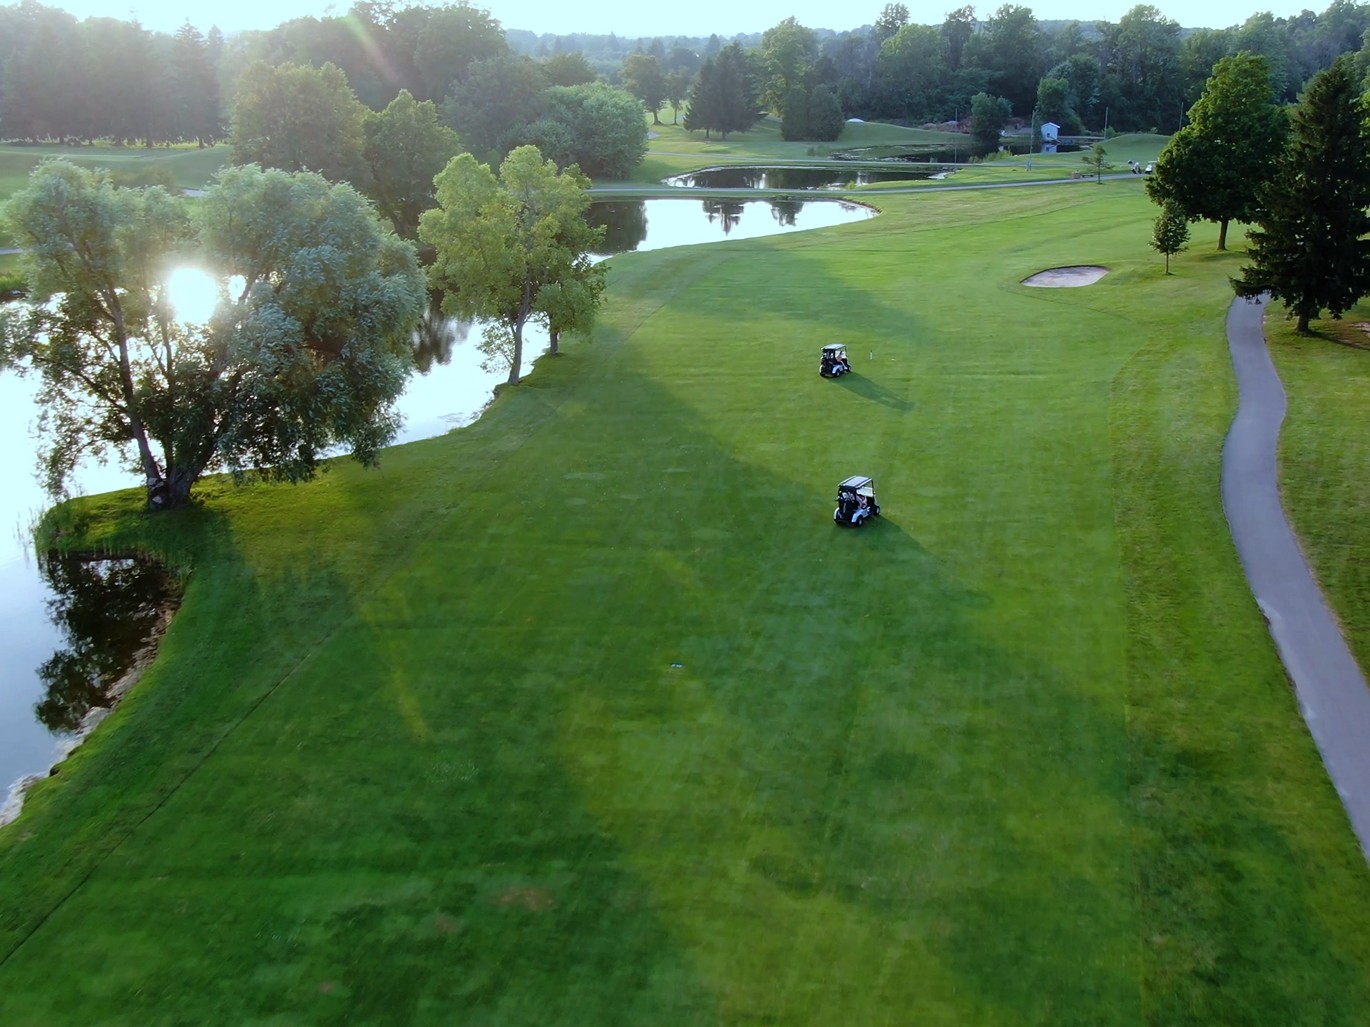
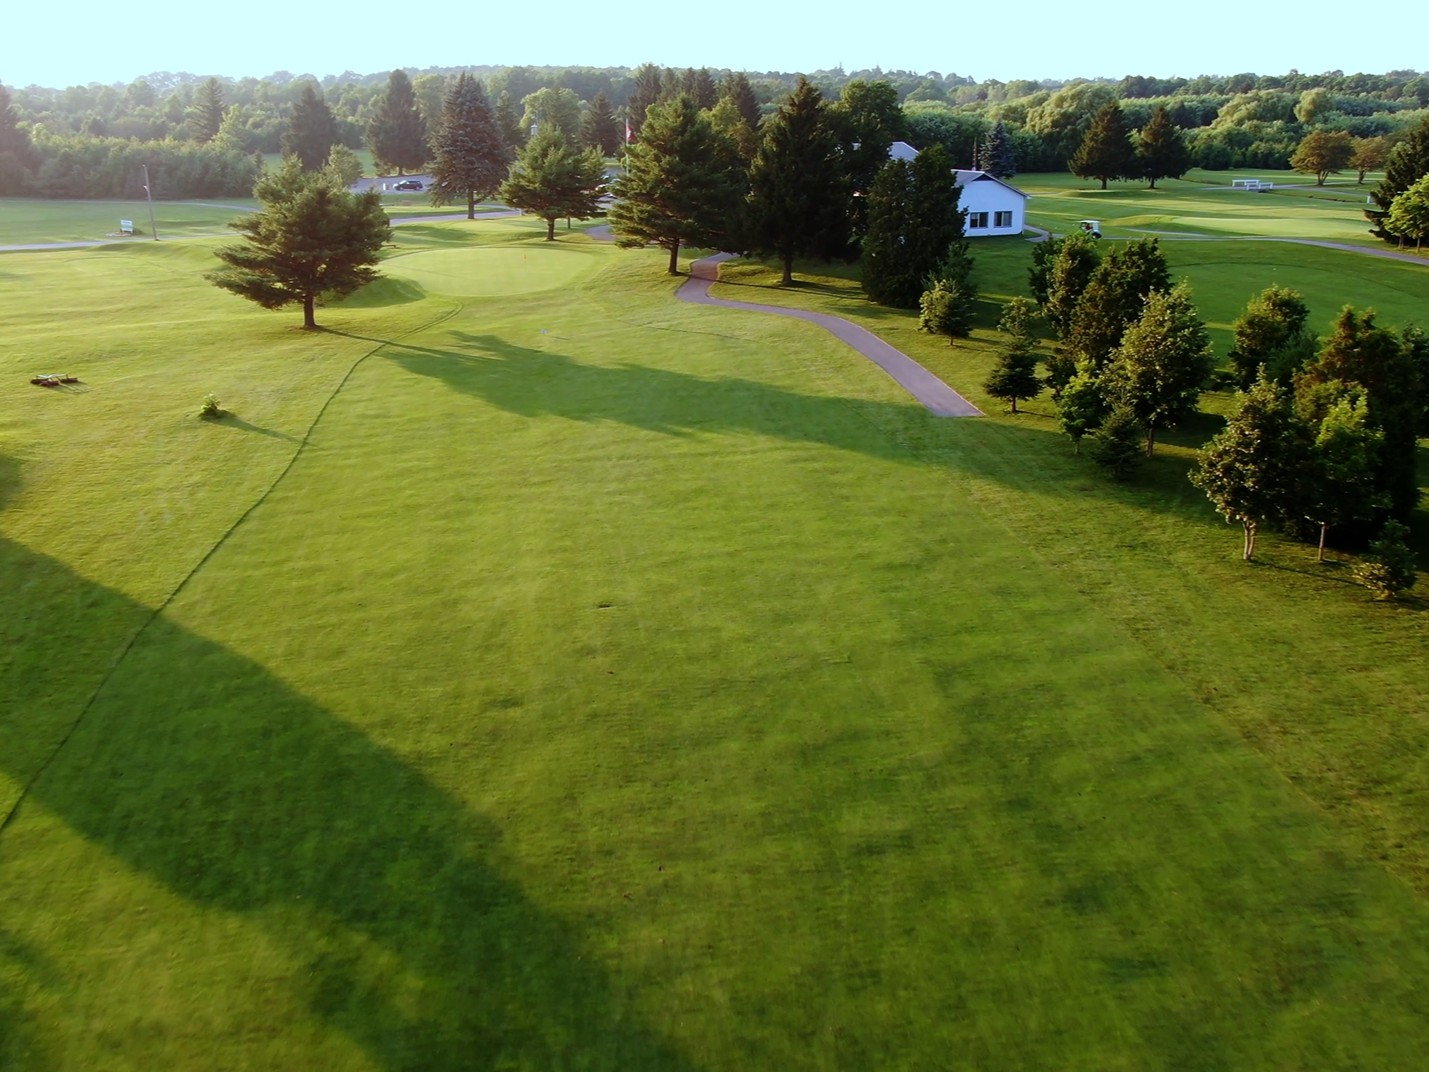
Hole 1
| Hole | 1 |
|---|---|
| Par | 4 |
| Gold | 344 |
| Blue | 333 |
| White | 328 |
| Light Blue | 300 |
| Red | 296 |
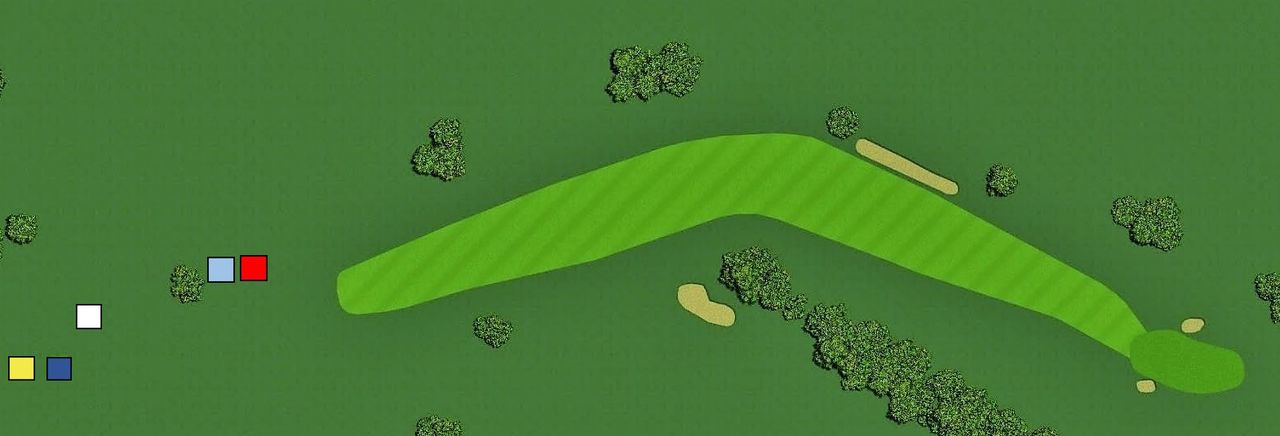
Pro Tip: “Your safe opening drive should be to the middle of a generous fairway, though an accurate driver over the trees on the right saves you 30 yards to the green”
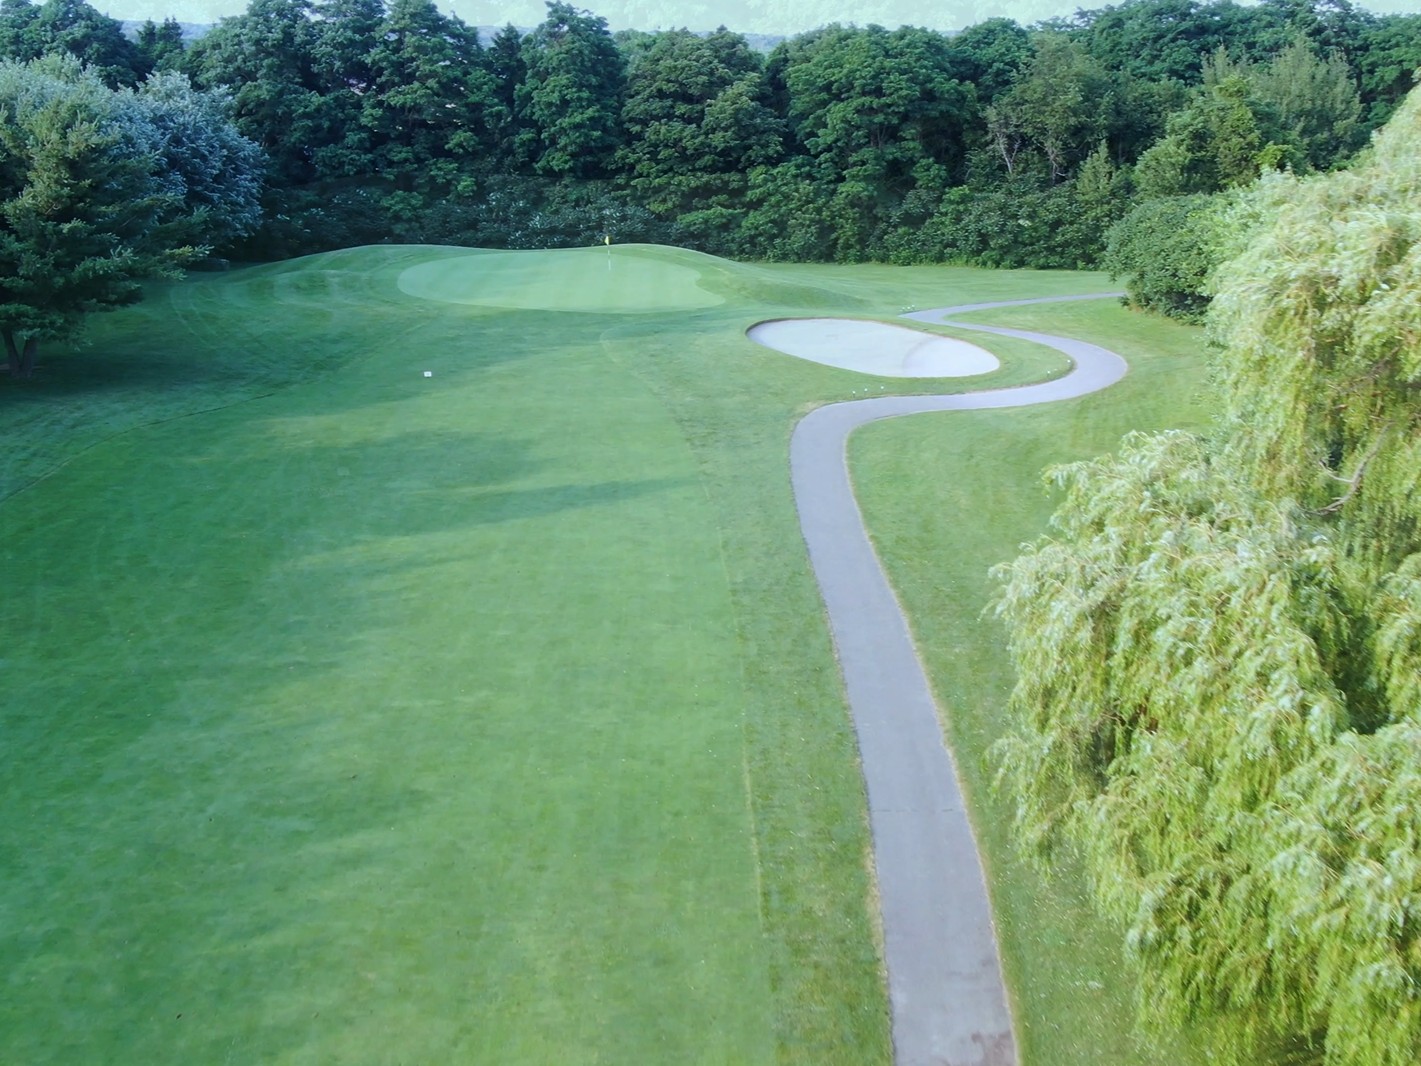
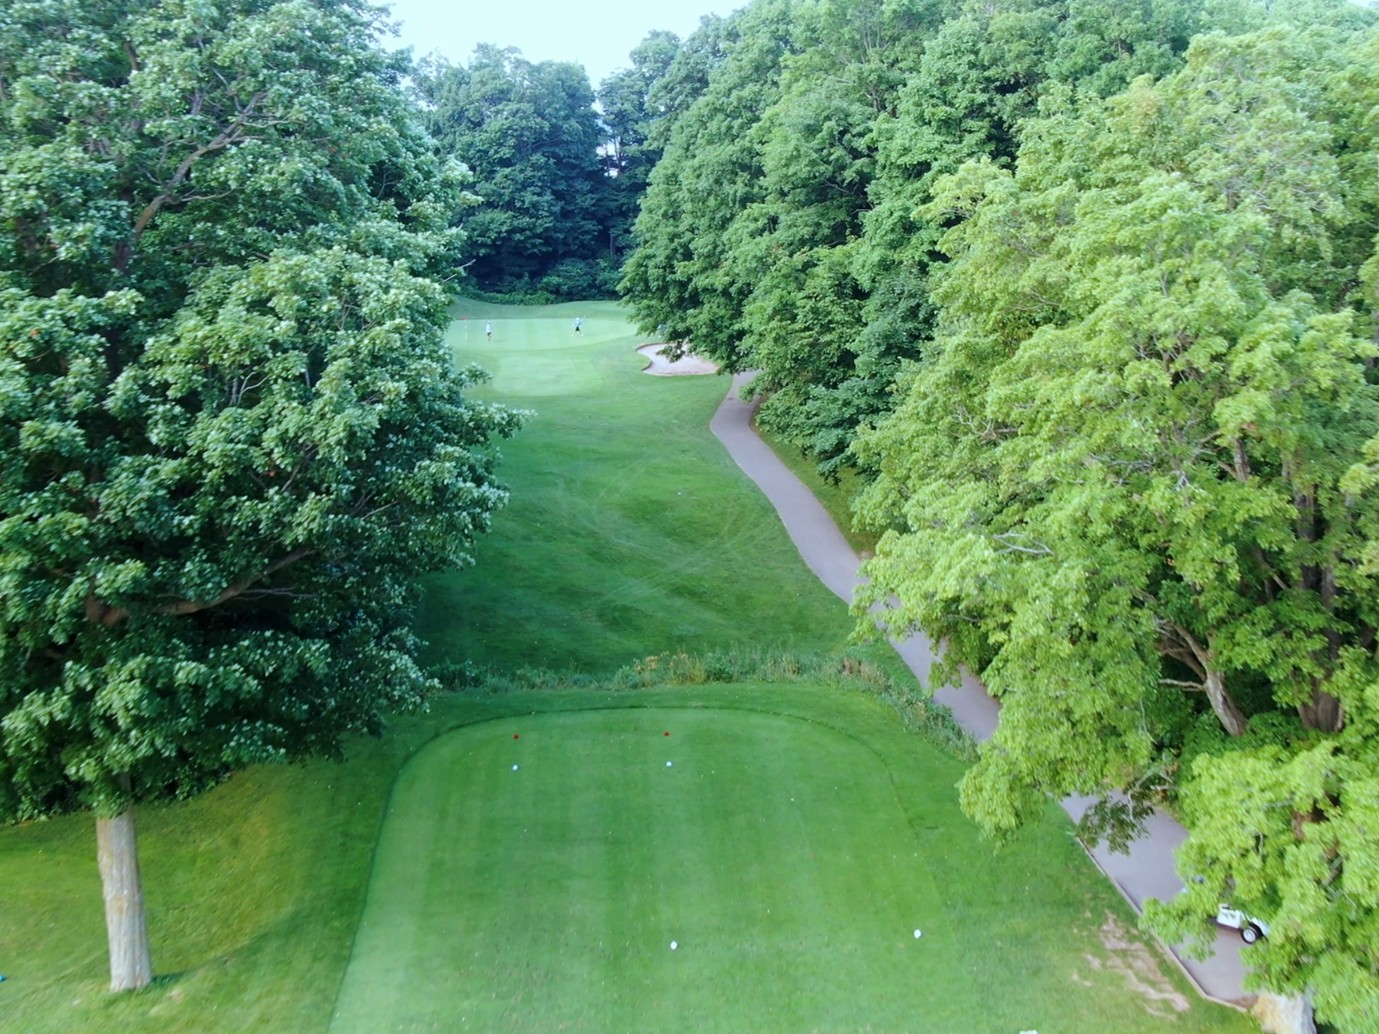
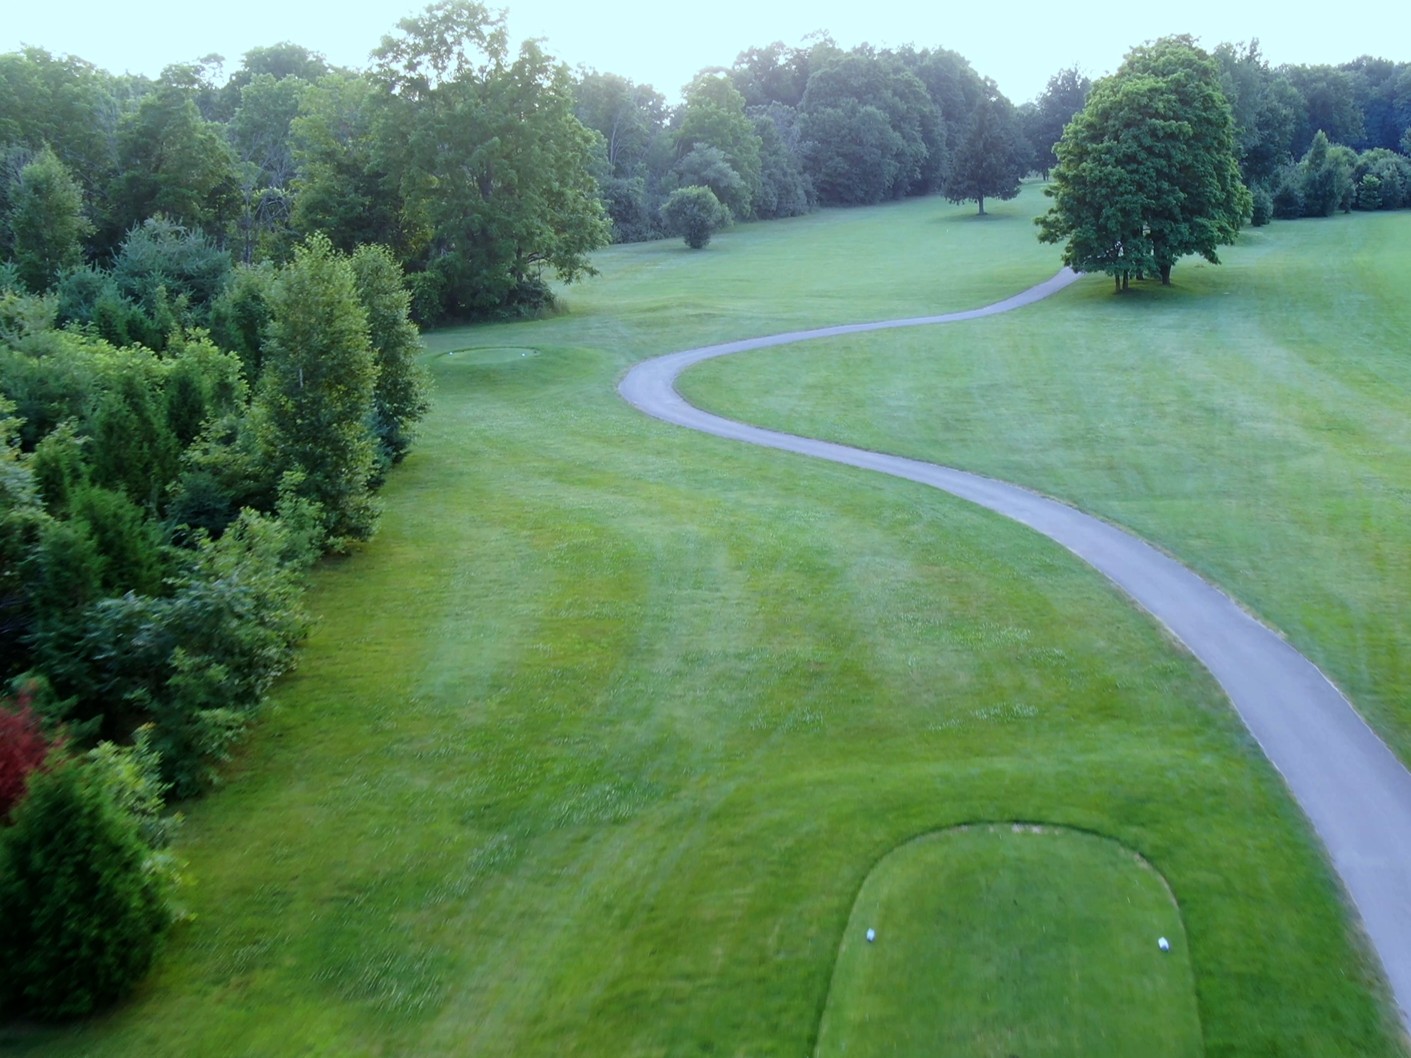
Click to view Hole #1 FlyOver
(then hit Back button once or twice on your device to return)
Click to ‘Play All’ Hole FlyOvers
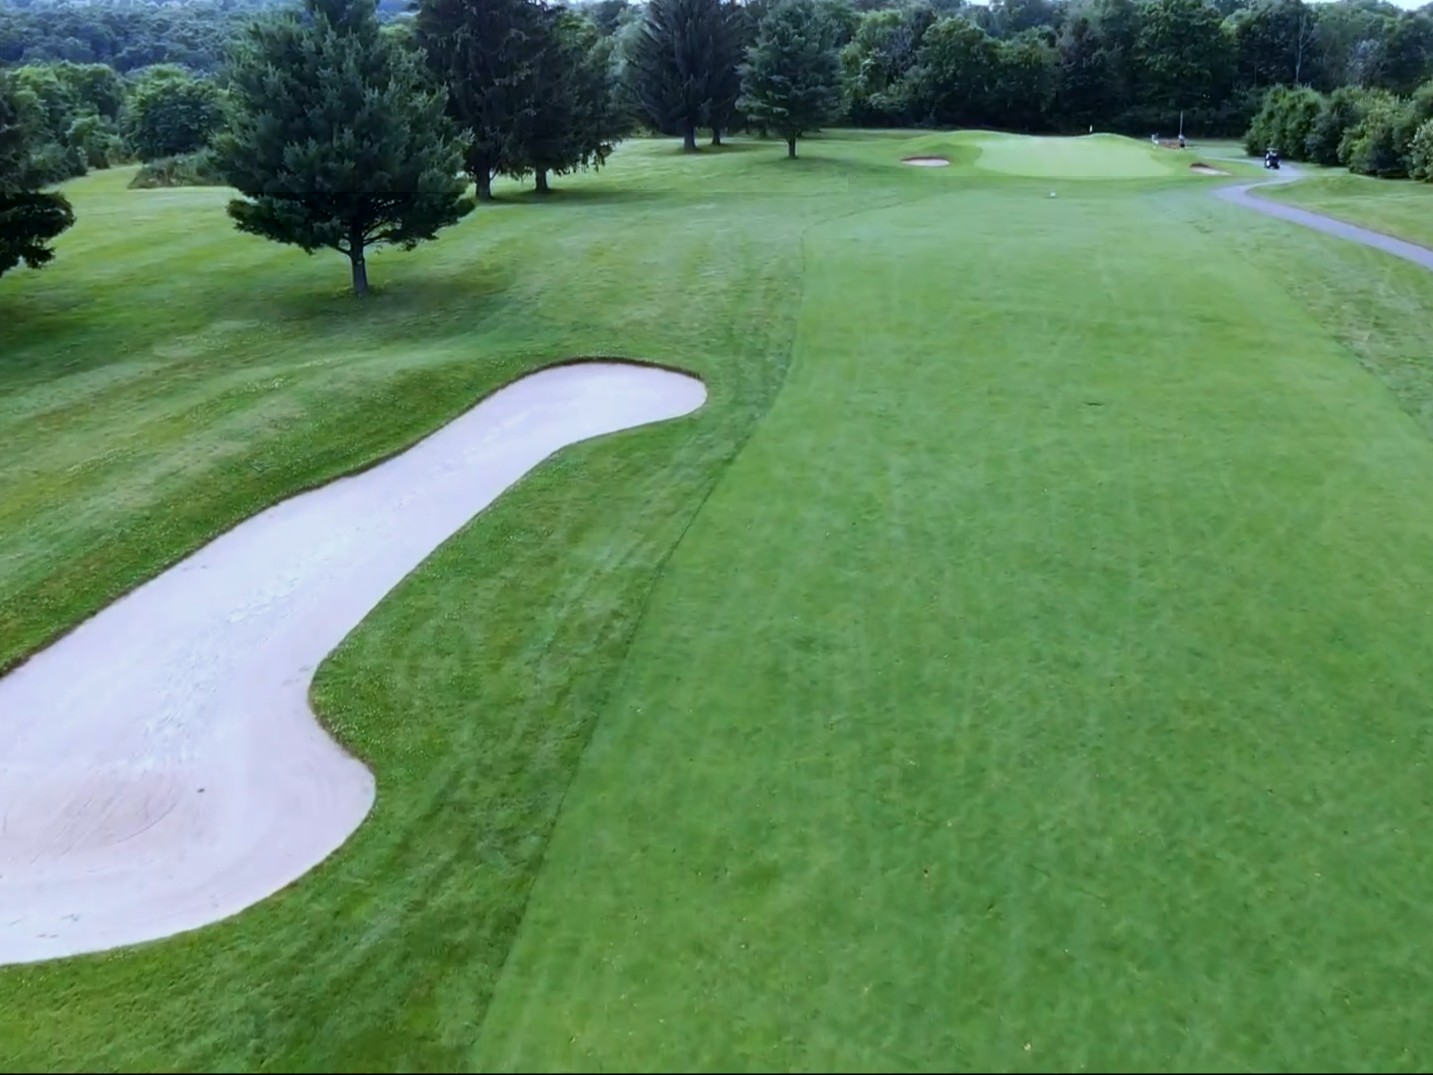
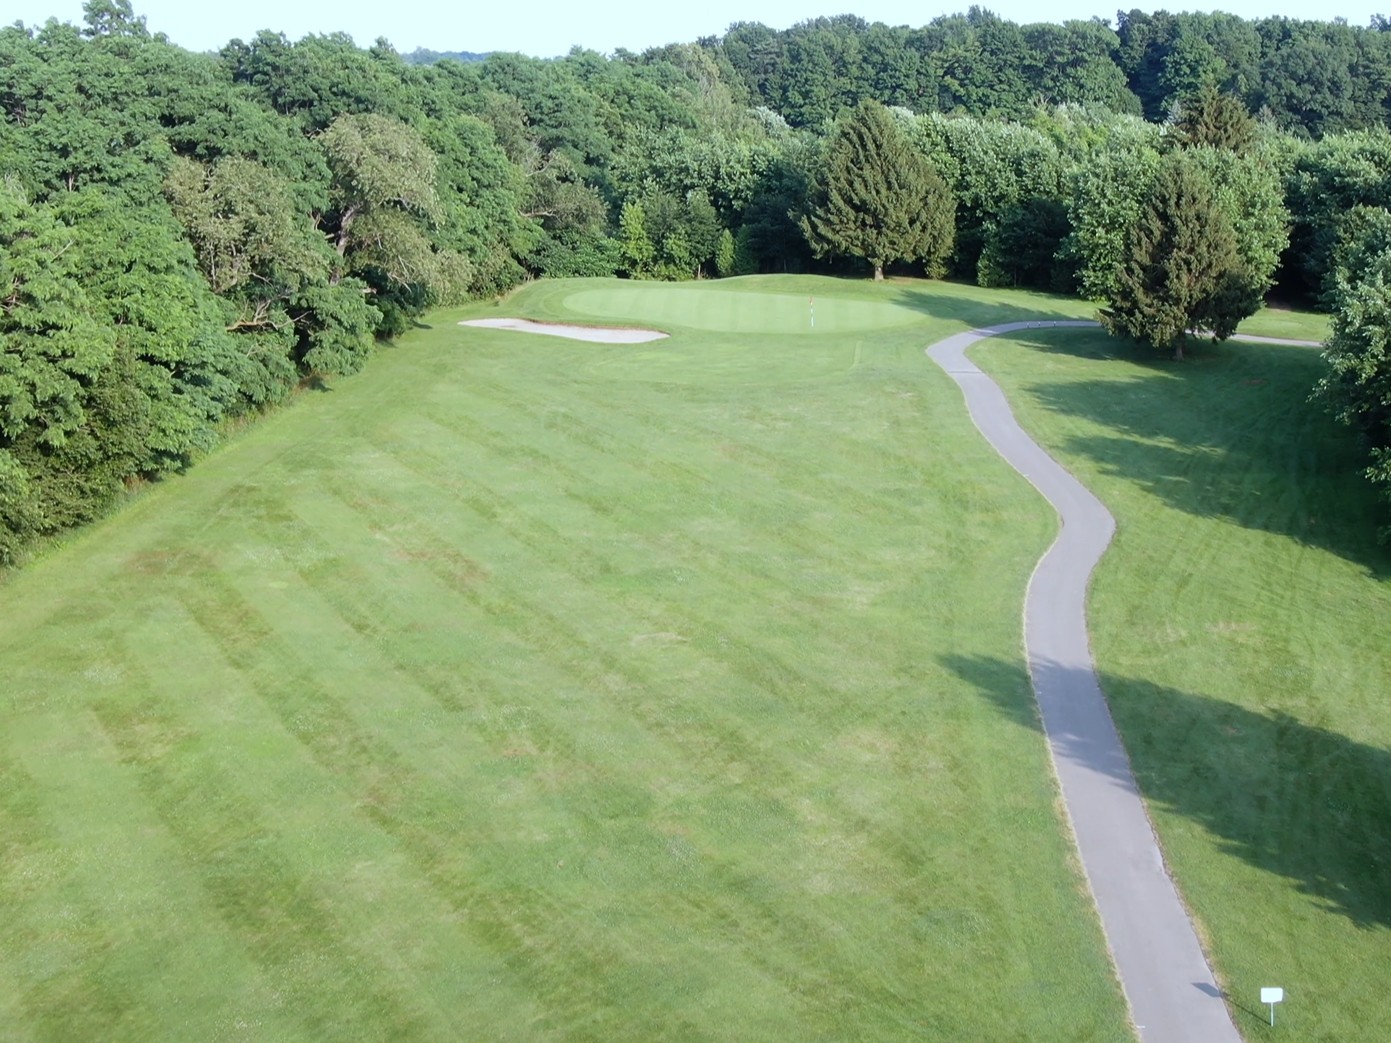
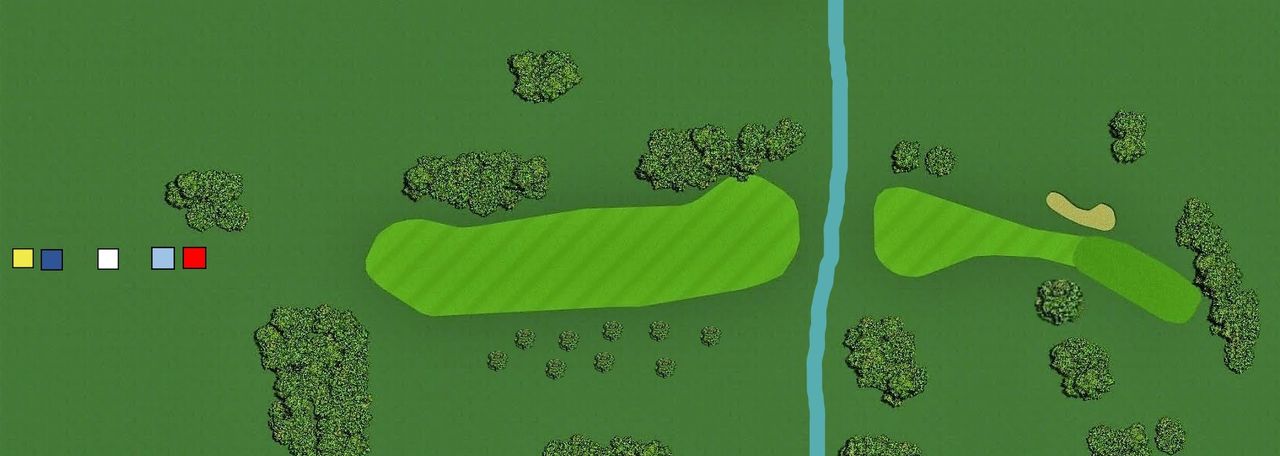
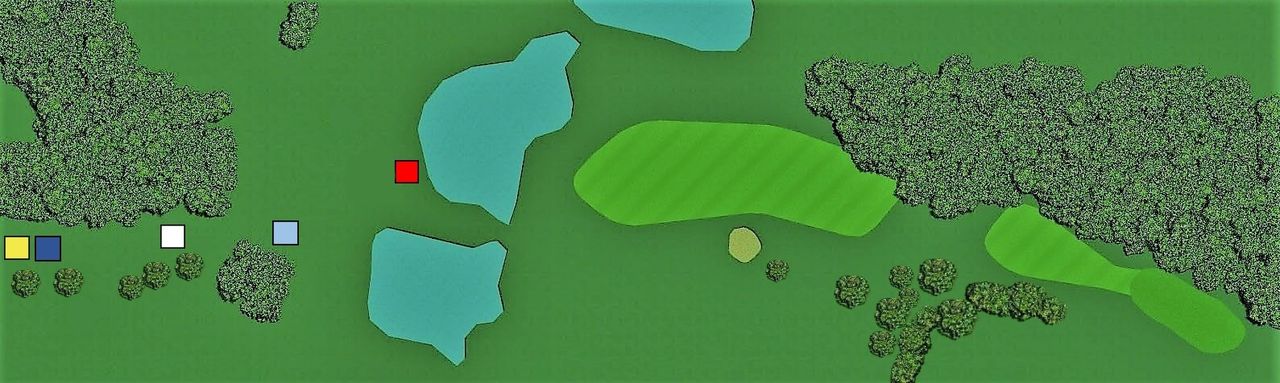
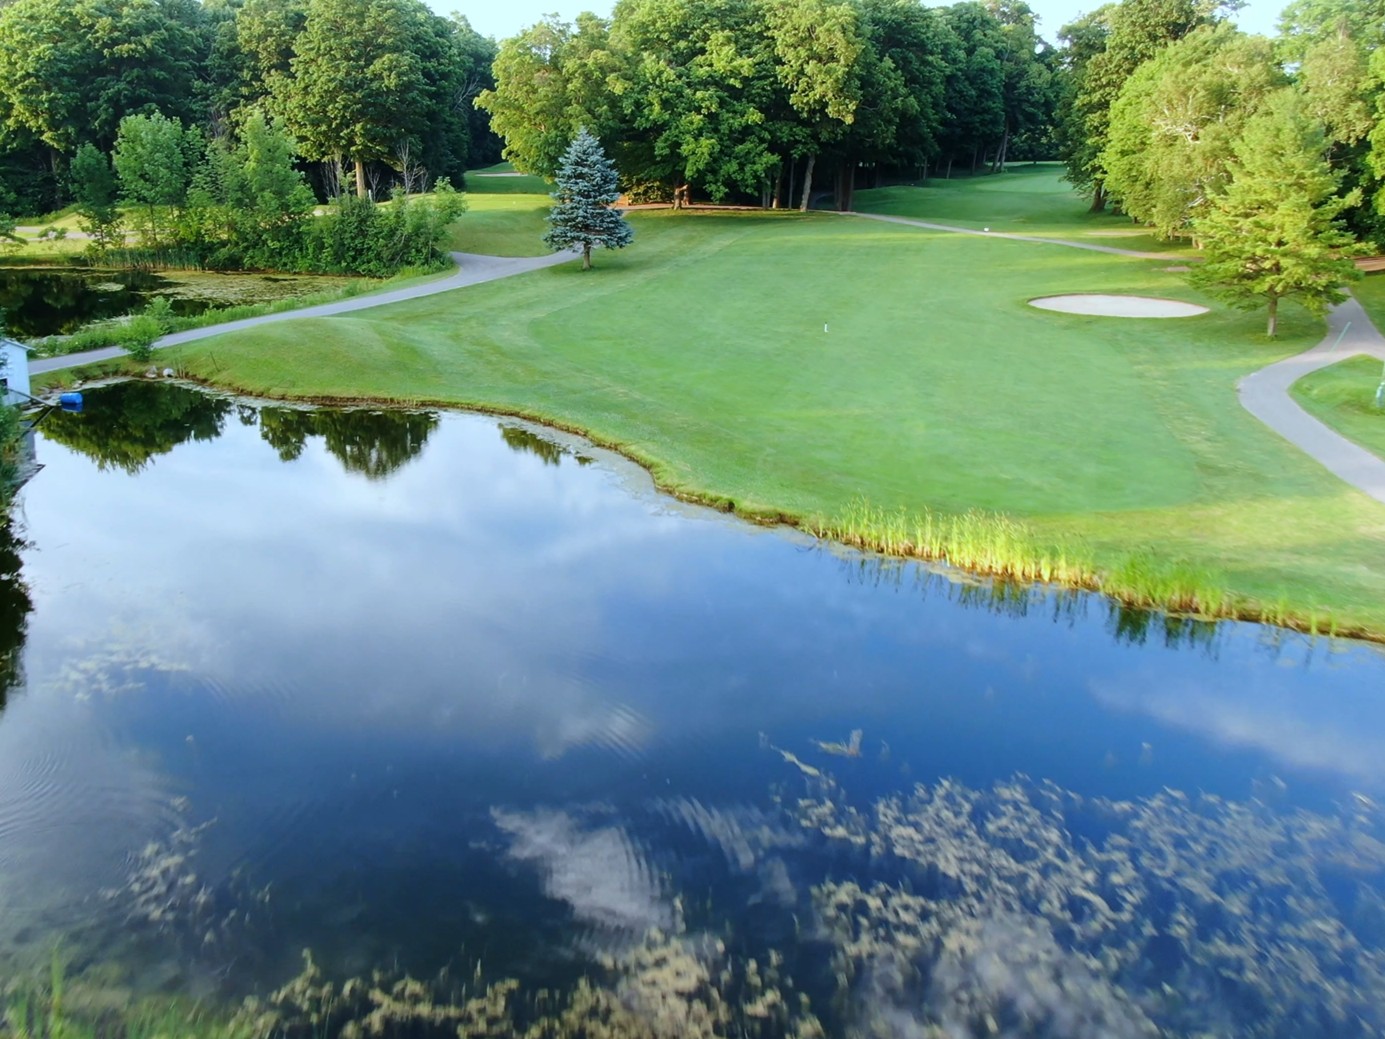
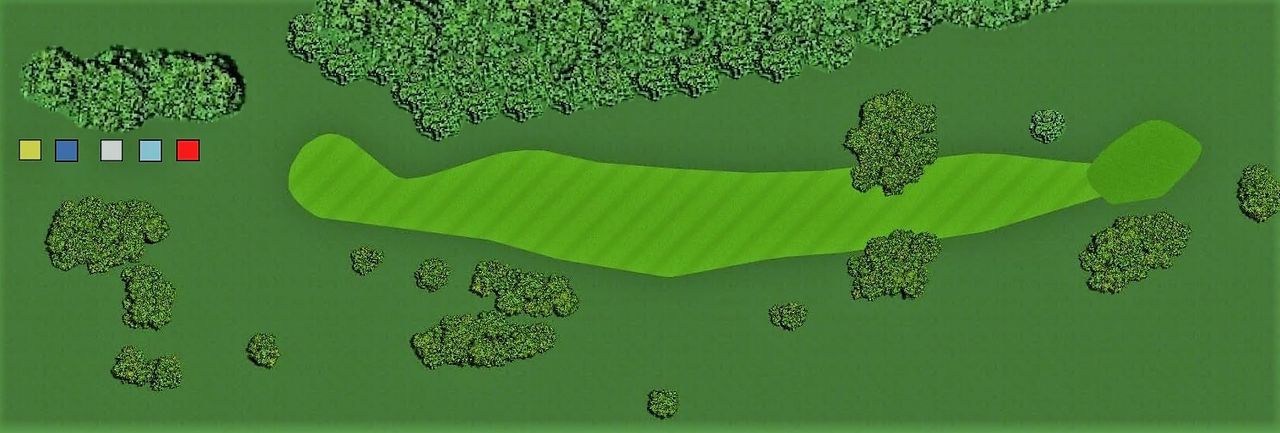
Hole 2
| Hole | 2 |
|---|---|
| Par | 5 |
| Gold | 536 |
| Blue | 485 |
| White | 431 |
| Light Blue | 424 |
| Red | 417 |
Pro Tip: “Better to be short than long on your approach shot… and if you find yourself on the wrong level of the green it’s a very challenging putt”
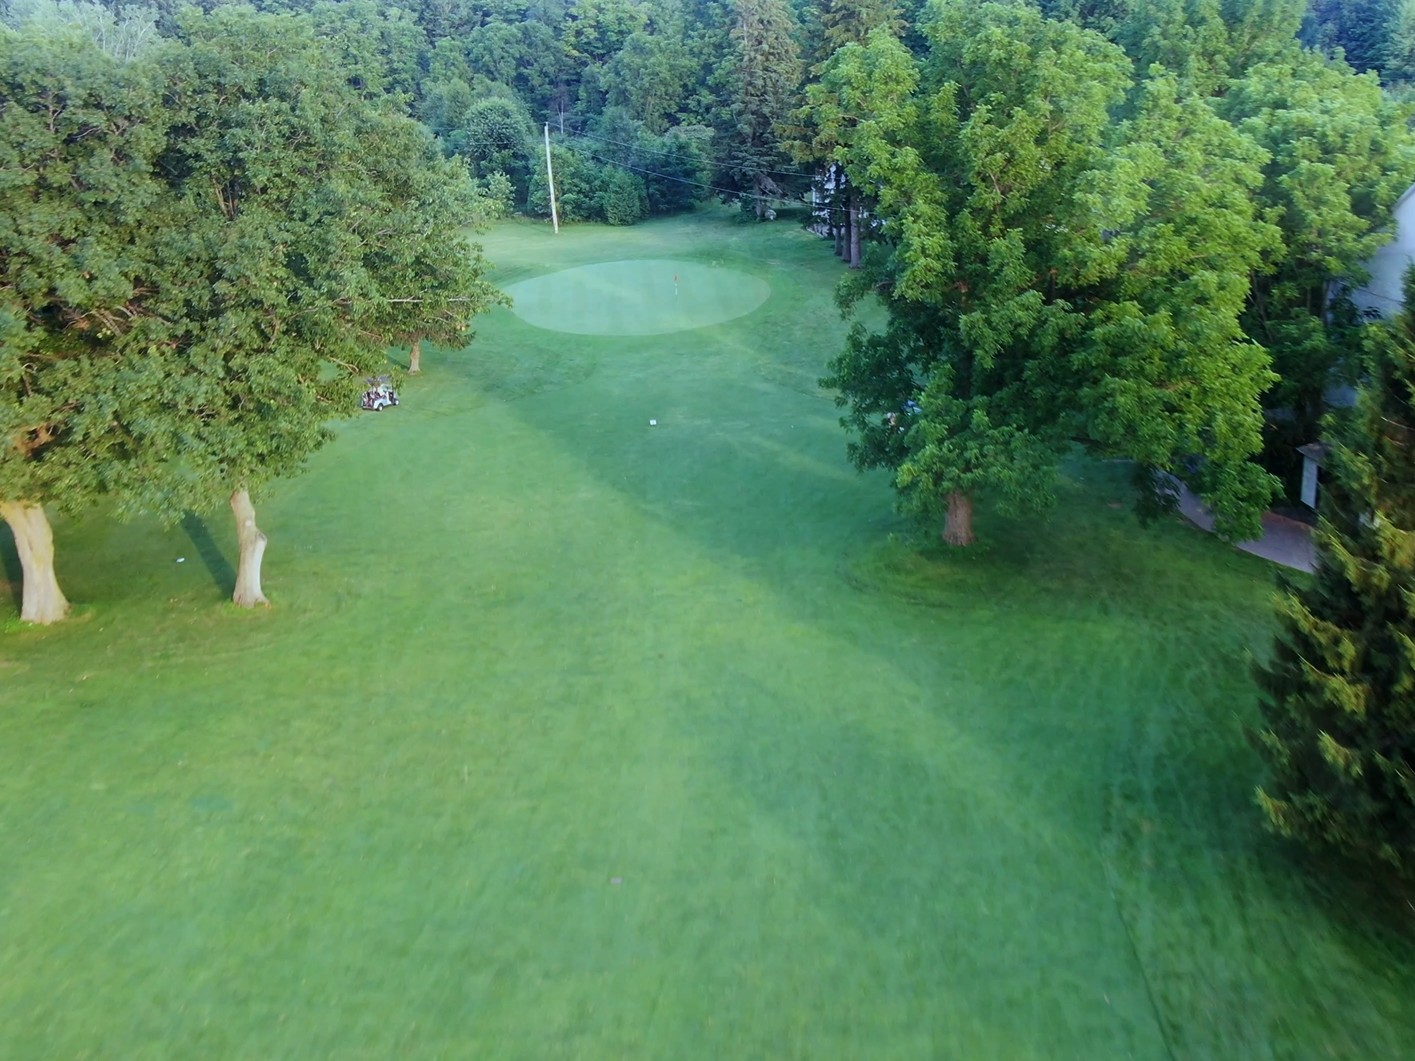
Click to view Hole #2 Flyover
(then hit Back button once or twice on your device to return)
Click to ‘Play All’ Hole FlyOvers
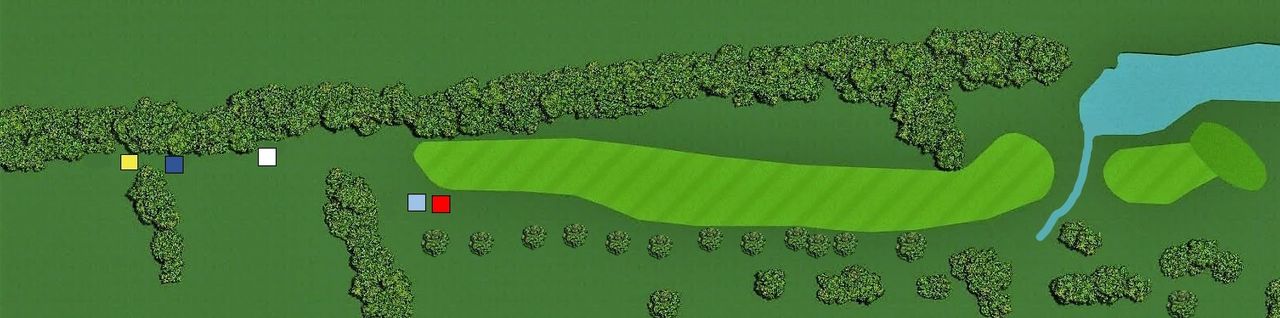
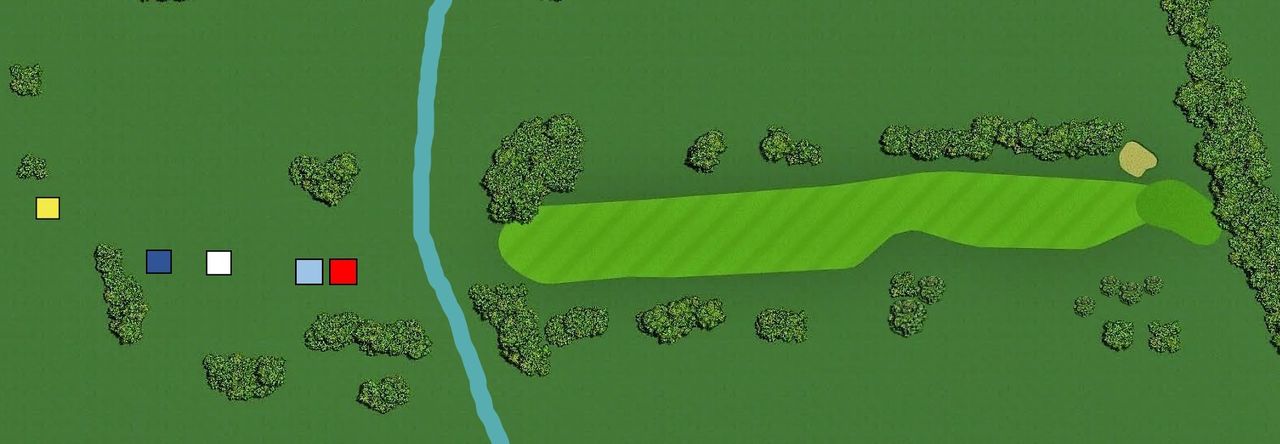
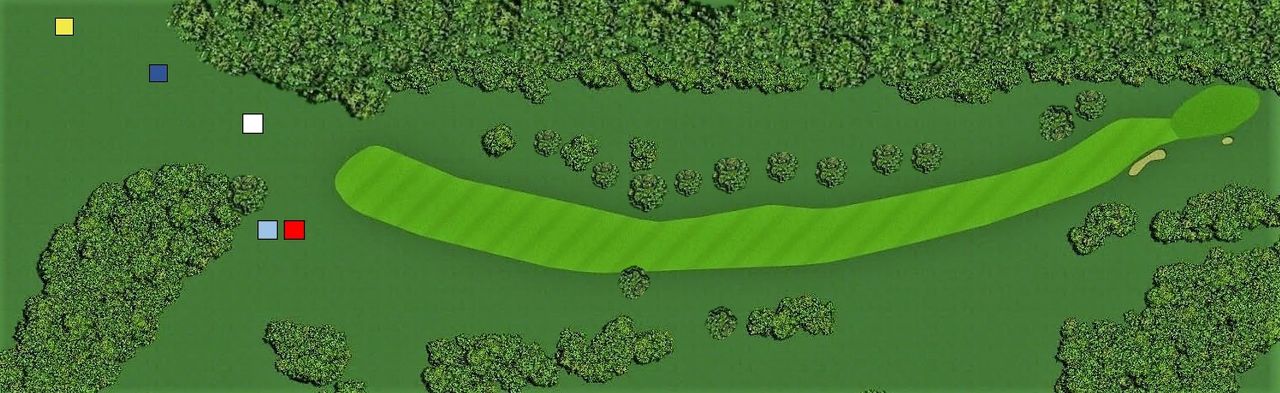
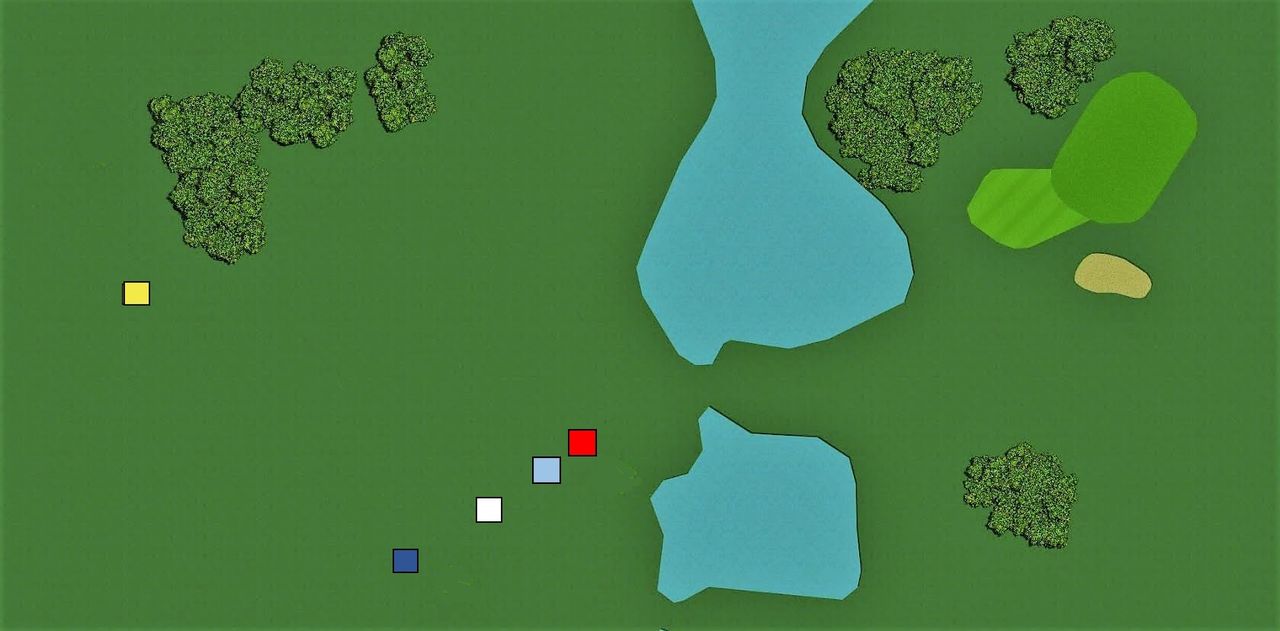
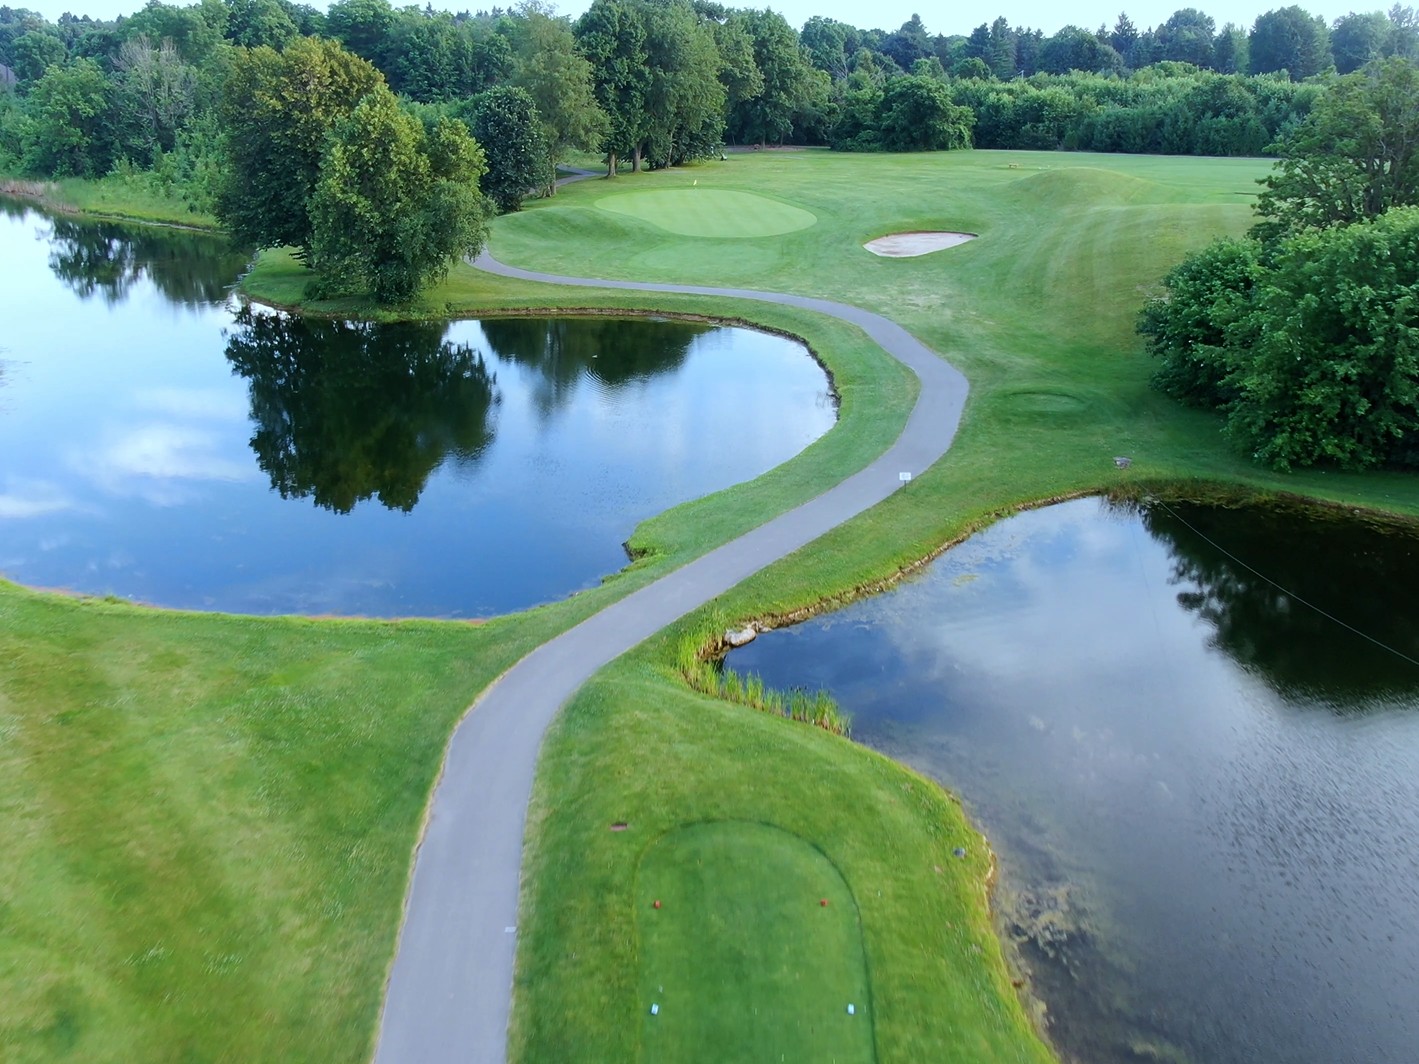
Hole 3
| Hole | 3 |
|---|---|
| Par | 3 |
| Gold | 163 |
| Blue | 148 |
| White | 146 |
| Light Blue | 144 |
| Red | 142 |
Pro Tip: “A relatively easy green to hit but wide enough to be a 3 putt threat, focus on a good lag”
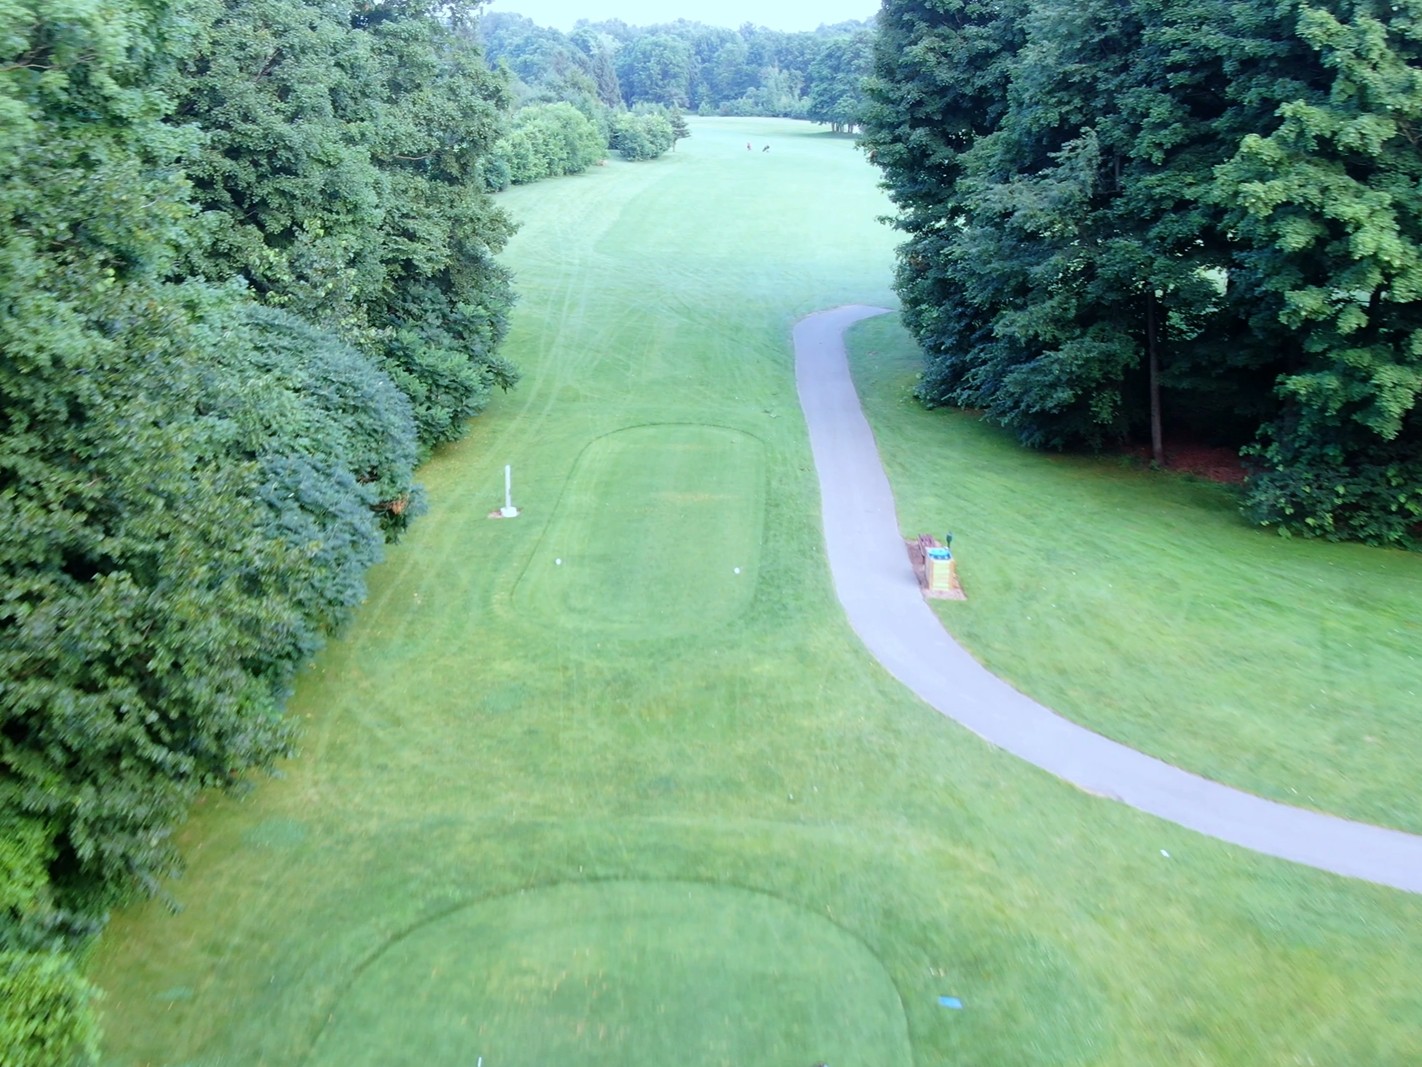
Click to view #3 Hole Flyover
(then hit Back button once or twice on your device to return)
Click to ‘Play All’ Hole FlyOvers
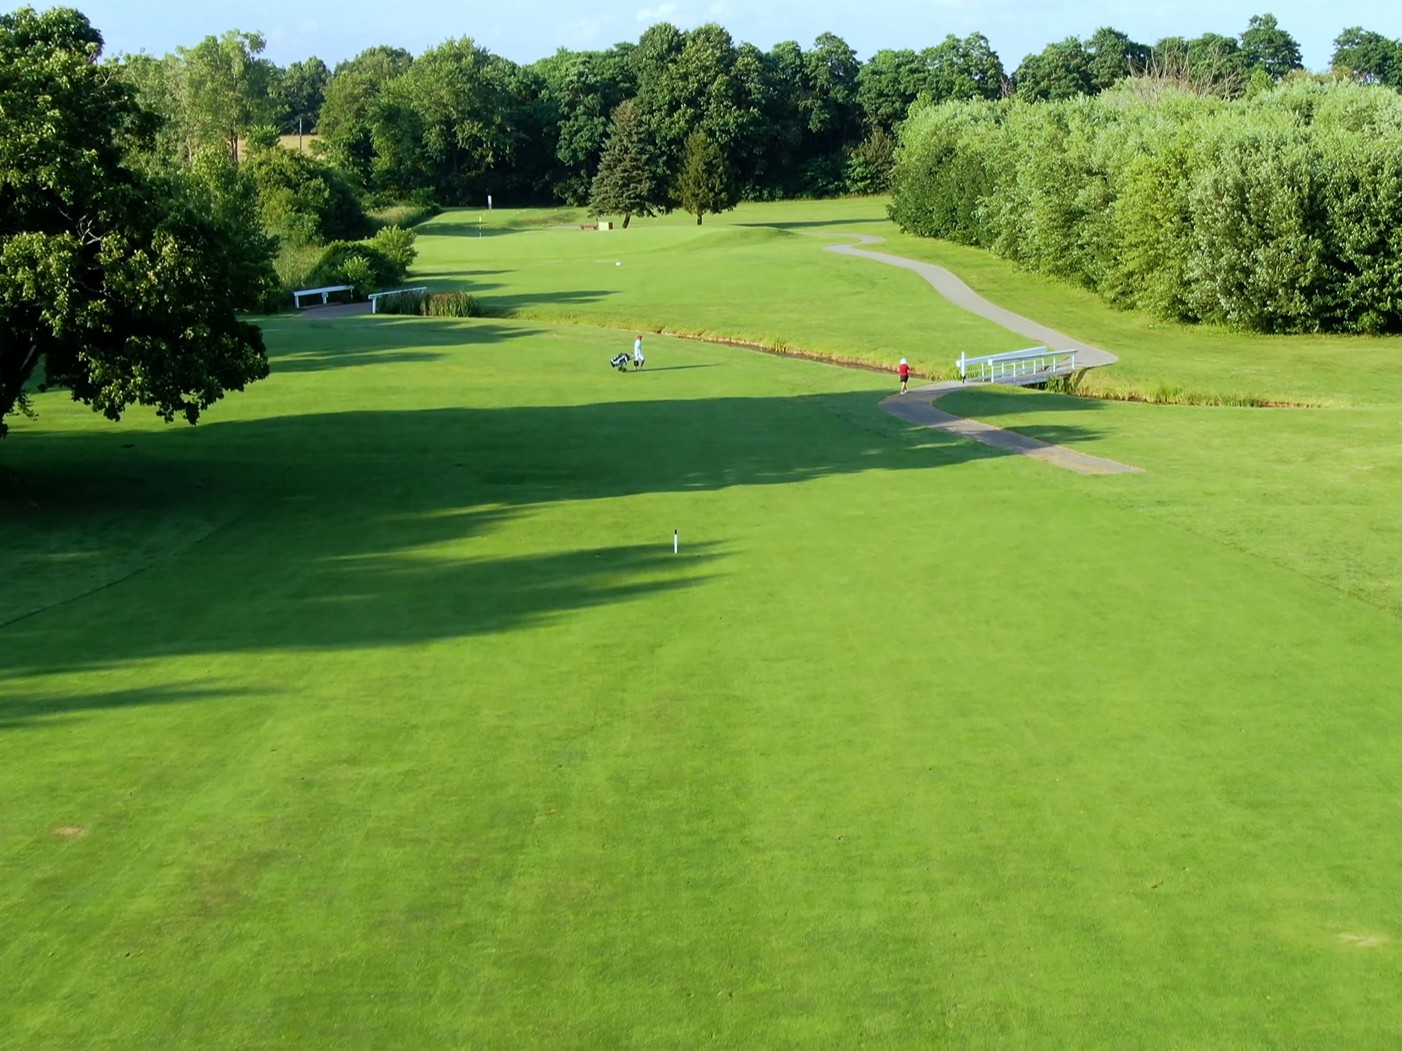
Hole 4
| Hole | 4 |
|---|---|
| Par | 4 |
| Gold | 431 |
| Blue | 395 |
| White | 376 |
| Light Blue | 332 |
| Red | 327 |
Pro Tip: “Generally, a lengthy second shot to a long and steep green, so make sure you use enough club”
Click to view Hole #4 Flyover
(then hit Back button once or twice on your device to return)
Click to ‘Play All’ Hole FlyOvers
Hole 5
| Hole | 5 |
|---|---|
| Par | 5 |
| Gold | 488 |
| Blue | 481 |
| White | 474 |
| Light Blue | 396 |
| Red | 392 |
Pro Tip: “Time to bomb it into the wide fairway for your best chance for birdie on the front”
Click to view Hole #5 Flyover
(then hit Back button once or twice on your device to return)
Click to ‘Play All’ Hole FlyOvers
Hole 6
| Hole | 6 |
|---|---|
| Par | 4 |
| Gold | 320 |
| Blue | 311 |
| White | 302 |
| Light Blue | 293 |
| Red | 284 |
Pro Tip: “Driver over the creek is an option only for the longest, straightest players – this is a layup hole”
Click to view Hole #6 Flyover
(then hit Back button once or twice on your device to return)

Click to ‘Play All’ Hole FlyOvers
Hole 7
| Hole | 7 |
|---|---|
| Par | 4 |
| Gold | 338 |
| Blue | 332 |
| White | 318 |
| Light Blue | 263 |
| Red | 258 |
Pro Tip: “Aim at the big tree and you’ll generally wind up with an unobstructed approach shot”
Click to view Hole #7 Flyover
(then hit Back button once or twice on your device to return)
Click to ‘Play All’ Hole FlyOvers
Hole 8
| Hole | 8 |
|---|---|
| Par | 3 |
| Gold | 198 |
| Blue | 147 |
| White | 139 |
| Light Blue | 134 |
| Red | 122 |
Pro Tip: “A par 3 many refer to as the ‘shortest par 5 on the golf course’ due to lurking double bogeys – tree trouble everywhere so hit it straight or suffer the consequences”
Click to view Hole #8 Flyover
(then hit Back button once or twice on your device to return)
Hole 9
| Hole | 9 |
|---|---|
| Par | 4 |
| Gold | 283 |
| Blue | 275 |
| White | 265 |
| Light Blue | 230 |
| Red | 225 |
Pro Tip: “Position is key, the green looks gettable but you’ll have more birdie opportunities from the middle of the fairway so consider clubbing down”
Click to view Hole #9 Flyover
(then hit Back button once or twice on your device to return)

Click to ‘Play All’ Hole FlyOvers
Hole 10
| Hole | 10 |
|---|---|
| Par | 4 |
| Gold | 302 |
| Blue | 295 |
| White | 288 |
| Light Blue | 280 |
| Red | 273 |
Pro Tip: “The easiest hole on the course, make sure you walk away with par or better”
Click to view Hole #10 Flyover
(then hit Back button once or twice on your device to return)
Click to ‘Play All’ Hole FlyOvers
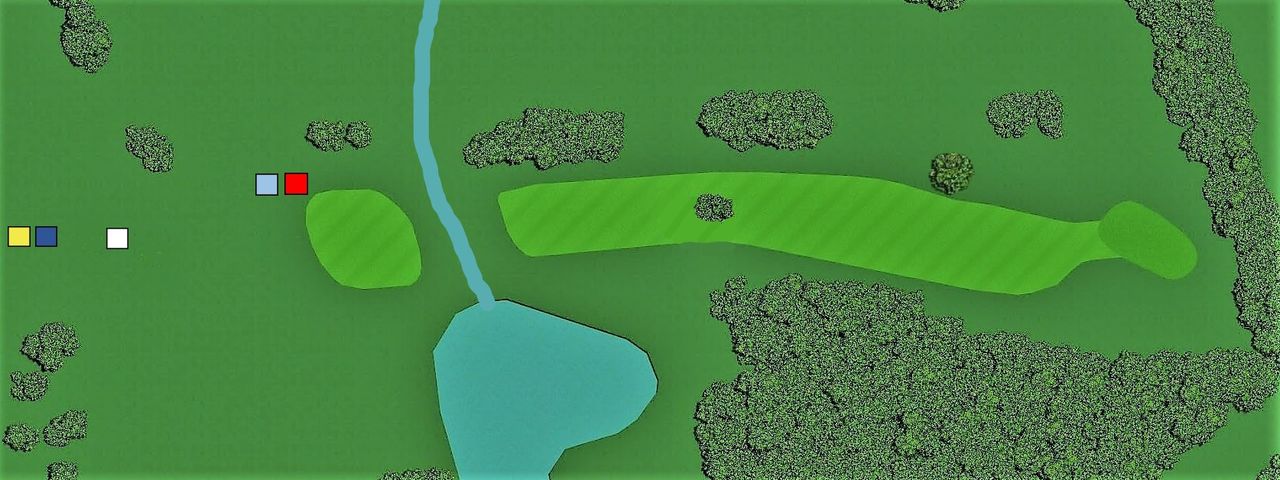
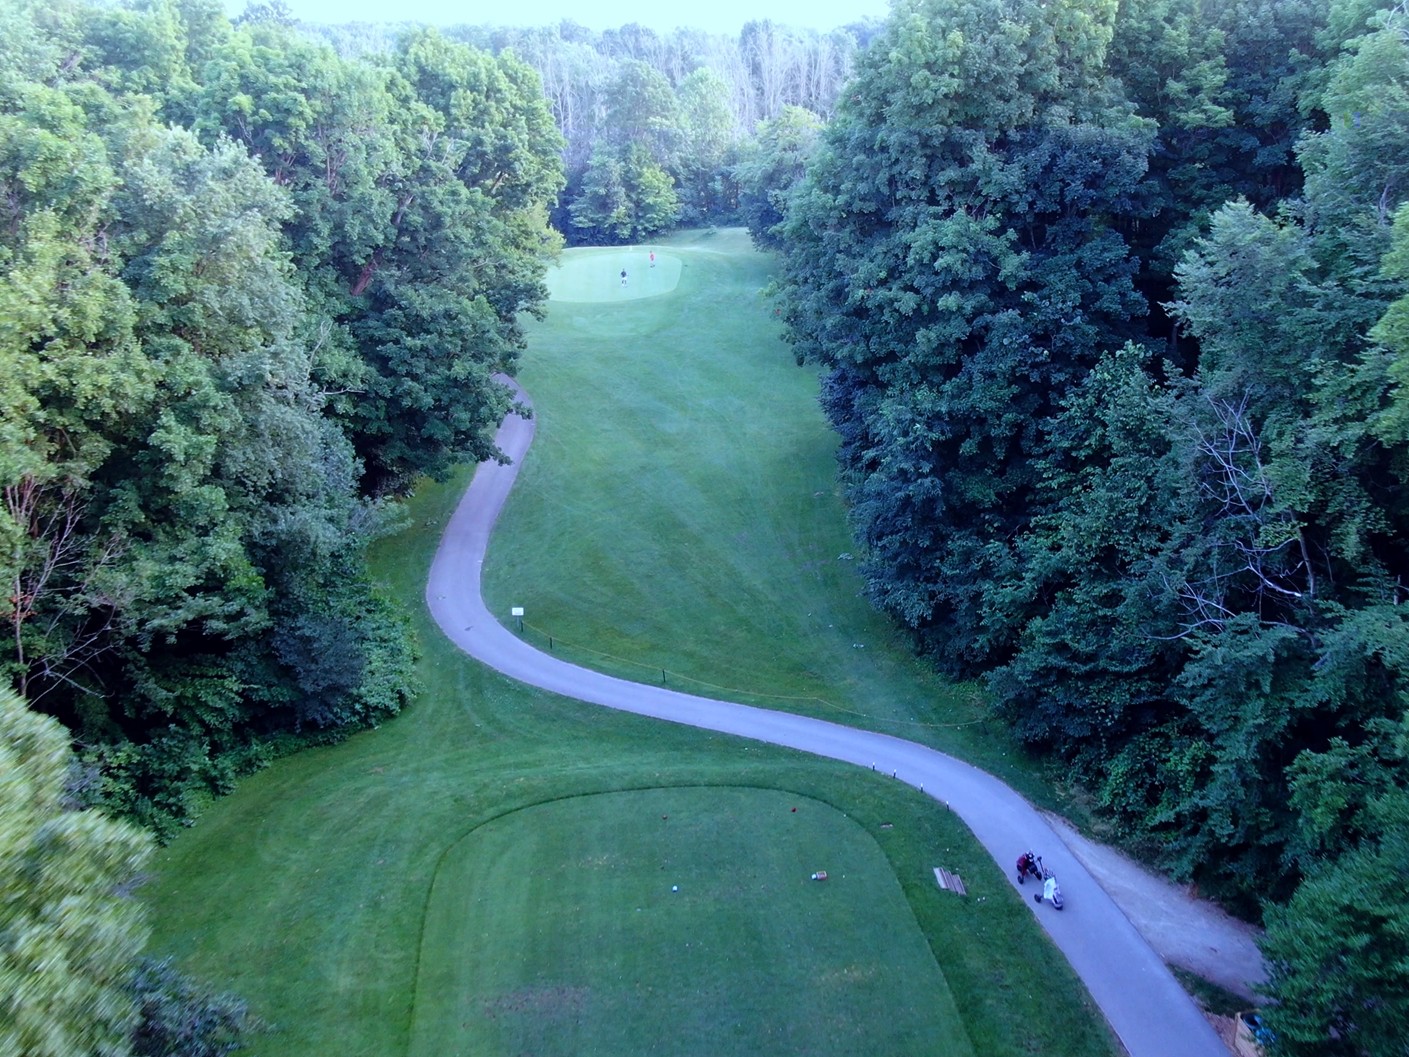
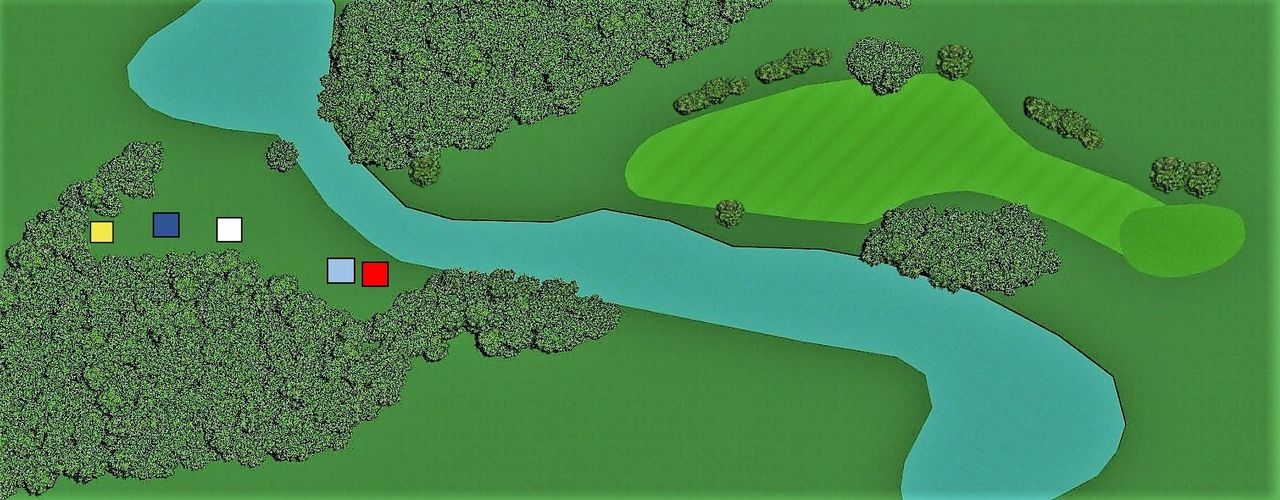
Hole 11
| Hole | 11 |
|---|---|
| Par | 4 |
| Gold | 343 |
| Blue | 312 |
| White | 286 |
| Light Blue | 252 |
| Red | 243 |
Pro Tip: “Our signature hole is a challenging drive across water to what looks like a wide fairway… use your most accurate club to avoid big trees on either side blocking your approach”
Click to view Hole #11 Flyover
(then hit Back button once or twice on your device to return)
Click to ‘Play All’ Hole FlyOvers
Hole 12
| Hole | 12 |
|---|---|
| Par | 3 |
| Gold | 159 |
| Blue | 151 |
| White | 144 |
| Light Blue | 136 |
| Red | 128 |
Pro Tip: “A half club or more is required on this scenic forest hole with elevated green, soak up the view”
Click to view Hole #12 Flyover
(then hit Back button once or twice on your device to return)
Click to ‘Play All’ Hole FlyOvers
Hole 13
| Hole | 13 |
|---|---|
| Par | 5 |
| Gold | 532 |
| Blue | 505 |
| White | 465 |
| Light Blue | 421 |
| Red | 414 |
Pro Tip: “Aim for the wide open right side of the fairway and stay there… avoid ‘Sherwood Forest’ on the left at all costs”
Click to view Hole #13 Flyover
(then hit Back button once or twice on your device to return)
Click to ‘Play All’ Hole FlyOvers
Hole 14
| Hole | 14 |
|---|---|
| Par | 4 |
| Gold | 416 |
| Blue | 372 |
| White | 357 |
| Light Blue | 289 |
| Red | 285 |
Pro Tip: “Right of the trees off the tee is like taking a penalty stroke – landing on the left side of the fairway is critical for a clear approach”
Click to view Hole #14 Flyover
(then hit Back button once or twice on your device to return)
Click to ‘Play All’ Hole FlyOvers
Hole 15
| Hole | 15 |
|---|---|
| Par | 4 |
| Gold | 338 |
| Blue | 328 |
| White | 318 |
| Light Blue | 307 |
| Red | 305 |
Pro Tip: “Hit the narrow target zone off the tee to ensure an open shot to our signature green… remember, the right side is your friend”
Click to view Hole #15 Flyover
(then hit Back button once or twice on your device to return)
Click to ‘Play All’ Hole FlyOvers
Hole 16
| Hole | 16 |
|---|---|
| Par | 4 |
| Gold | 344 |
| Blue | 340 |
| White | 324 |
| Light Blue | 314 |
| Red | 305 |
Pro Tip: “Water all the way down the left so now is not the time to snap hook your drive…. another green to aim right”
Click to view Hole #16 Flyover
(then hit Back button once or twice on your device to return)
Click to ‘Play All’ Hole FlyOvers
Hole 17
| Hole | 17 |
|---|---|
| Par | 3 |
| Gold | 184 |
| Blue | 178 |
| White | 173 |
| Light Blue | 148 |
| Red | 140 |
Pro Tip: “Some will say the toughest par 3 on the course, especially in the wind – take an extra club or prepare yourself for a very long putt”
Click to view Hole #17 Flyover
(then hit Back button once or twice on your device to return)
Click to ‘Play All’ Hole FlyOvers
Hole 18
| Hole | 18 |
|---|---|
| Par | 5 |
| Gold | 539 |
| Blue | 489 |
| White | 473 |
| Light Blue | 414 |
| Red | 410 |

Pro Tip: “Last chance to bomb it off the tee, make a birdie on the last par 5, and finish your round in style”
Click to view Hole #18 Flyover
(then hit Back button once or twice on your device to return)
Click to ‘Play All’ Hole FlyOvers